Building and hanging a shed door is arguably one of the tougher parts of building a shed. If your shed plans have instructions on how to build the shed door and you are not sure abou it or you simply want to build a new door for your existing shed then you have come to the right place. This post will teach you how to build a very strong and easy to build shed door using basic sandwich construction.
The structural part of the door will fit inside the shed door opening and the outside face of the door will sit flush with the exterior siding and overlap the exterior edge of the door opening similar to how a car door has an outer edge that overlaps the door frame and an inner structure that is thicker and recesses into the car wall.
Materials:
- 1/2″ O.S.B. sheeting
- 2×4 lumber
- 1/2″ Exterior Grade Plywood with rough sawn finish on one side.
- 1-1/2″ deck screws.
Measure The Door Opening: Even if you built the shed from a set of shed plans you should always measure the door opening and build the door to fit inside of it. This guarantees that your door will fit inside the existing opening.
- Measure the width and height inside the door opening.
- Subtract 1/2″ off of each dimension. You will use these dimensions in the next step.
Connect the inside panel of the door to the internal framing:
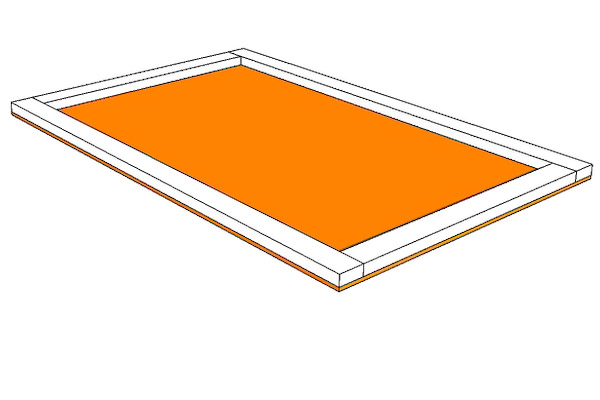
- Cut a piece of Oriented Strand Board, O.S.B., to the dimensions that are 1/2″ smaller than the door opening.
- Cut 4 boards from 2×4 wood that will boarder the inner O.S.B. panel.
- Lay 2×4 boards around the outer edges the inner piece of O.S.B. making sure that the outside edges of the 2×4’s are flush with the edges of the O.S.B.
- Screw the O.S.B. to the 2×4 boards using the deck screws.
This panel and framing should fit inside the door opening and have a 1/4″ space around all edges.
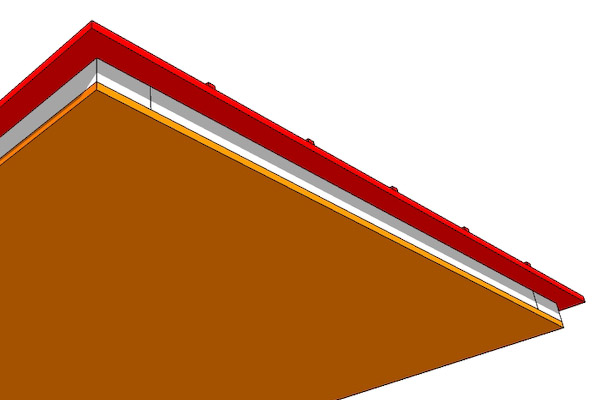
Build The Outer Door Panel: The final piece to the door is the outer panel which completes the “sandwich” door, gives the door extra strength and makes the door look good from the outside of the shed.
- Cut a piece of rough sawn exterior grade plywood so that it is 3″ bigger than the inner door panel. When you lay it on the interior door panel it will overhang 1-1/2″ on all sides. So if your inner door panel and framing is 3′ wide and 6′ tall you will cut the exterior plywood to 3′-3″ x 6′-3″.
- Remove the shed siding 1 -1/2″ from around the outer edges of the door opening on all 4 sides. The bottom may not have siding on it. The outer panel of the door will fit into this cut away space. The piece of exterior grade plywood should fit into this outer opening and have 1/4″ gap on all sides.
- Make sure that the textured side of the plywood is facing to the outside. Place the plywood on the inner frame you built earlier and make sure that the plywood overhangs the 2×4 frame 1-1/2″ on all sides. Attach the outer panel to the inner frame that you built earlier using the deck screws. Use 4 screws to temporarily attach the plywood to the frame so you can test it in the doorway before putting more screws in.
Test Fit The Door: Before you screw the door together better and attach hinges you need to check it to make sure it fits in the opening and that the outer panel fits well against the exterior of the siding.
- Set 1/4″ shims in the doorway and set the door on the shims.
- Check the fit around the inner edges of the door. There should be 1/4″ on all sides of the inner door frame between the door frame and the door opening inside of the shed.
- Check the fit of the plywood outer face of the door against the siding on the shed. There should also be a 1/4″ gap on all sides on the outside.
- Install the screws as close to the edges of the outer panel as you can and still have them go into the 2×4 boards. This will hide them once the trim is installed on the door.
- Install a screw about every 8 inches.
- The trim is not necessary to trim the door but is usually desired for looks.
- You can do any design you like. The trim is not structural so you can boarder the edges, make a Z pattern or a horizontal rail.
- If you do trim the door you will need to install trim around the door on the shed wall so that the gate hinge will be able to screw on a level surface.
- Set the door on the shims.
- Center the door in the opening.
- Screw the hinges into the shed wall and then into the shed door. Make sure the hinge is placed so that the screws go through the exterior plywood and into the 2×4 inner frame.
- Attach the door latch after the door is hung and opens and closes properly.


