SHOP BY STYLES
Backyard Shed Plans Barn Shed Plans Chicken Coop Plans Compost bin Plans Corner Shed Plans Detached Garage Plans Dog Kennel Plans Dormer Shed Plans Firewood Shed Plans Garage Shed Plans Garden Shed Plans Generator Shed Plans Greenhouse Shed Plans Hip Roof Shed Plans Horse Barn Plans Large Shed Plans Lean To Shed Plans Loft Shed Plans Low Income Housing Plans Metric Garden Sheds Modern Shed Plans Porch Shed Plans Run In Shed Plans Saltbox Shed Plans School Bus Shelter She Shed Plans Short Shed Plans Tiny House PlansSHOP SIZES
4x8 Shed Plans 4x10 Shed Plans 4x12 Shed Plans 6x6 Shed Plans 6x8 Shed Plans 6x10 Shed Plans 6x12 Shed Plans 8x8 Shed Plans 8x10 Shed Plans 8x12 Shed Plans 8x14 Shed Plans 8x16 Shed Plans 8x20 Shed Plans 10x10 Shed Plans 10x12 Shed Plans 10x14 Shed Plans 10x16 Shed Plans 10x18 Shed Plans 10x20 Shed Plans 10x24 Shed Plans 12x12 Shed Plans 12x14 Shed Plans 12x16 Shed Plans 12x18 Shed Plans 12x20 Shed Plans 12x24 Shed Plans 14x14 Shed Plans 14x16 Shed Plans 14x20 Shed Plans 14x24 Shed Plans 16x16 Shed Plans 16x20 Shed Plans 16x24 Shed Plans 24x24 Garage PlansSHED BUILDING VIDEOS
All Shed Building Videos Backyard Gable Shed Videos Lean To Shed VideosSHED IMPROVEMENT HOW TOO'S
Learn about Concrete, Electrical, Framing, Codes, Roofing, Solar and more!MORE SHED PAGES
Lean To Shed Ideas Office Shed Convert Shed Design Building A Shed How To Build A Home Shed Door Plans Build A Shed Ramp Eagle Scout Shed PlansInstalling Tile Backer Board Subfloor For Studio Sheds and Office Sheds with Tile Floors

The first step in tiling a floor is installing concrete backer board. Concrete board is made from concrete on the inside and covered with a fiber mesh out the outsides to give it strength. It provides a solid, stable, water resistant underlayment for tile or stone floors and improves the bond of the tile or stone to the O.S.B. or plywood sub floor. The two main manufactures of concrete board are Durock and James Hardi. This article teaches you everything you need to know about installing concrete / cement board on floors.
Concrete backer board is sometimes called cement backer board.
brief how toIn this article, you will find information about:
- Layout The Pattern
- How To Cut Concrete Board, Hardi board, Durock
- Apply Mortar Or Adhesive To The Floor
- How To Lay Down Concrete Board
- Fastening The Concrete Board
- Sealing The Joints
- Set The Tile
tools and materials
- concrete backer board
- utility knife and extra blades
- tape measure
- pencil
- 1 1/4" Durock tile backer screws or 1 1/2" hot-dipped galvanized roofing nails
- Alkali resistant tape specified by the manufacturer
- Type 1 organic adhesive or latex modified thin set mortar suitable for bonding cement board
Step 1 Layout The Pattern
Before cutting and installing the backer board you should figure out the layout of the cement backer board on the floor. Try to put any cuts along walls and let the factory edges butt up against each other in the field.
step 2 How To Cut Concrete Board, Hardi board, Durock
Cutting concrete board is quite easy. Simply use a utility knife and score one side of the board, enough to cut thru the fiber mesh that is on the surface. You do not need to actually cut the cement. Then turn the board over and push with even pressure on the back side of the score mark. The cement board will break along the score line. Make sure any cuts in the backer board are done before laying the backer board on the adhesive or mortar. If you do need to lift the backer board off the mortar to cut it again be sure to get any cuttings out of the mortar stuck to the cement backer board so the cement backer board lays flat.
step 3 Apply Mortar Or Adhesive To The Floor
Apply the mortar or adhesive bedding to the sub floor. If you are installing mortar make sure to use a notched trowel to spread it with. Also make sure there are no stray nails or other things that will hold the cement backer board off the sub floor.
step 4 How To Lay Down Concrete Board
- Install the backer board with ends and edges closely abutted, but not forced them together, about 1/8" or less apart.
- Stagger the end joints like stacking bricks after the first course.
step 5 Fastening The Concrete Board
Screw the Durock to the floor using either screws or nails spaced at 8 inches on center in both directions. Start nailing in the center of the panel and work your way outward. On the edges you must put a fastener between 3/8" and 5/8" from the edge. Drive the fasteners so that the bottom of the heads are flush with the surface and the panel and be sure to not over drive them. Make sure the panel is in good contact with the mortar or adhesive on the sub floor.
step 6 Sealing The Joints
Before you install tile you must seal the joints using tile-setting thinset and fibermesh joint tape. These are the steps to installing cement backer board joint tape. These products are sold where you purchase the Durock or Hardiboard
Get the area where the joint tape and mortar will touch damp. Use a sponge and bucket of water.

Stretch the joint tape over the joint. Center it on the joint.

Press the fiber mesh joint tape to the floor, it should stick just slightly.

Use thinset mixed to the consistency of warm peanut butter and a flat trowel. Hold one end of the joint tape and pull the trowel away from the hand holding the tape in place while spreading the thinset mortar.

For wide joints you will need to make sure that the joint under the tape is filled, it helps to pull the trowell the perpendicular to the joint to get the thinset into the joint.

After the joint tape is fully covered go over the length of the joint tape in one smooth motion to get a finish that is flat so you do not have trouble, bumps, setting tile on the shed floor when the joint is dry.

A finished cement backer board joint will show some of the top of the tape and screw head, depending on the levelness of the backer board and how deep the screw heads are set into the hardi board or durarock cement board..

Put a thin coat of mortar over the joint making sure to fill the joint, apply the tape and then put a coat of mortar over the tape. Keep the joint as flat as possible to avoid trouble when it is time to set the tile.
step 7 Set The Tile
You are now ready to install the floor tile of your choice on your backyard shed floor.
How To Cut Cement Board

Cutting cement backer board is very similar to cutting drywall. Backer board is a popular substrate to use under tile or cultured stone. This article will teach you how to cut cement board.
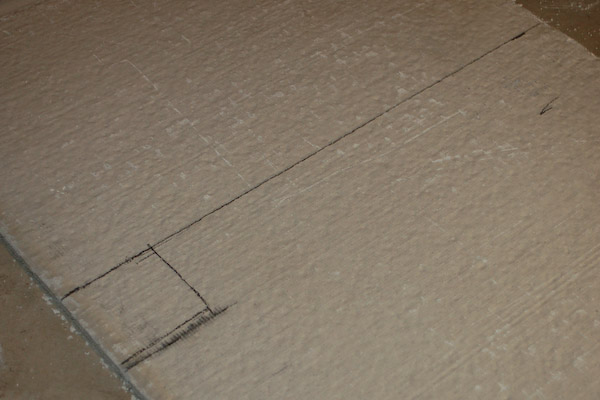
step 1 Mark The Cut Line

Use a construction pencil to mark the cement board where you will make cuts
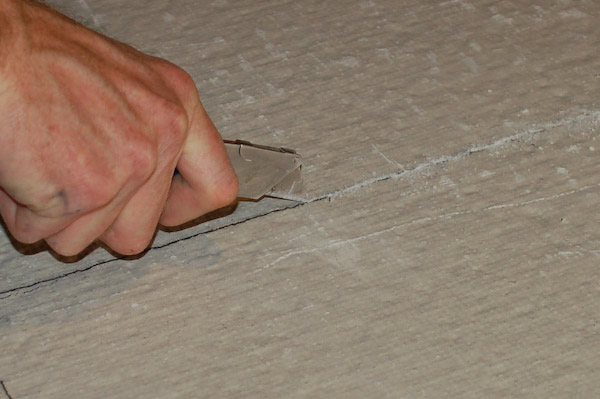
step 2 Score The Cut Line

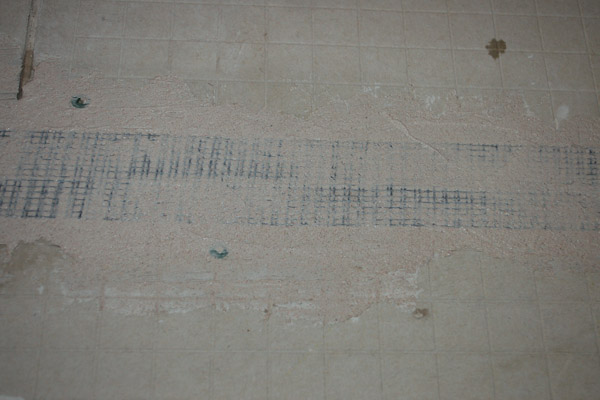
Use the utility knife to cut along the pencil line at the desired cut. The trick is to cut through the fiber mesh that is just under the cement board surface. If you look closely you can see the fiber mesh pattern on the surface.
- Make several passes with the utility knife until the fiber mesh is cut.
- Do not try to cut any deeper than the fiber mesh.
step 3 Press On The Opposite Side Of The Score Line

To break the board along the cut line:
- Turn the cement board over
- Press with even pressure on the back side of the score line
- Lift one of the two pieces
step 4 Snap The Board
The cement board will snap along the cut line.

step 5 Cut The Back Side

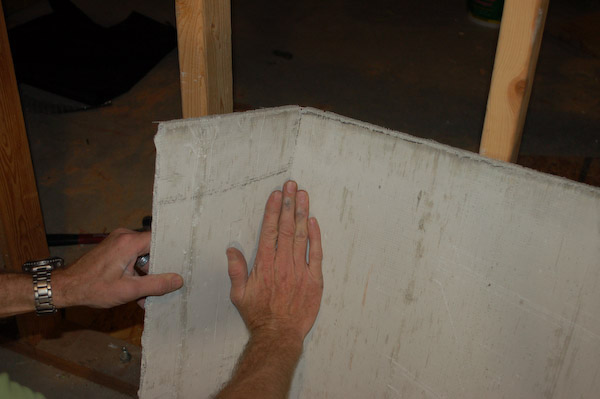
After the backer board is snapped the two pieces will still be attached together by the fiber mesh on the opposite side of the cut. Finish cutting the cement board.
- Hold the two pieces at right angles to each other and cut the fiber mesh by running the utility knife along the angle.
step 6 Special Cement Board Cuts
Nibble: To cut off a small edge you will need to use pliers to "nibble" off the cut edge because there is not enough surface area to snap the cement board with your hands.

Cut Out A Special Shape: To cut out special shapes, like inside corners around the shed doorway, you will need to cut both sides of the cement board. Mark the cut out area on both sides of the cement board exactly opposite each other and then score both sides along the cut lines. Once you have scored throught the fiber mesh on both surfaces the cement board will crack along the score lines when you wiggle the piece.

